Quick and Simple Fabric Projects: Make the Most
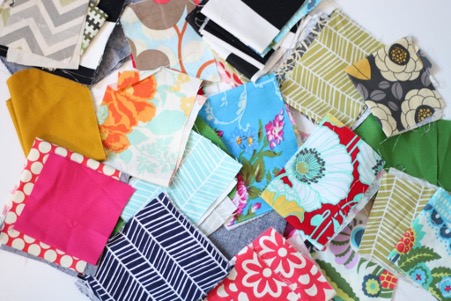
If you love sewing, then chances are you have a few fabrics scraps leftover. If you’ve ever wondered what to do with all those left-over loose scraps just keep reading! Being a tailor, dressmaker, fashion designer, upholsterer, product designer or interior designer or even if you just enjoy sewing it means that you’re often left with unused excess fabric; pieces, strips, and scraps of fabric, varying in size. We thought we’d give a few quick and simple craft ideas for anyone wanting to make the most out of their leftover fabrics.
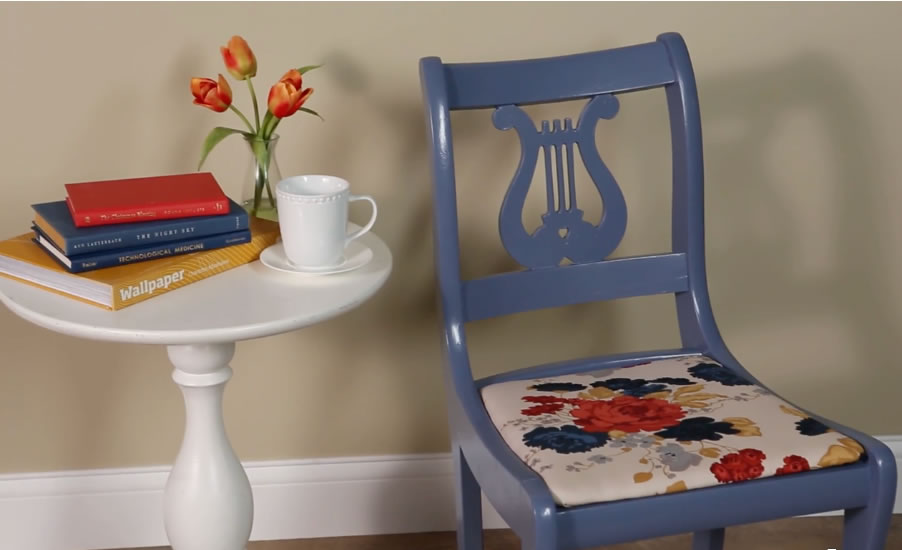
1. Chair Reupholstery
Give tired and worn-out dining room chairs a fix up by reupholstering the seat covers. This can be a great way to use some of the larger fabric scraps you have laying around, or to use multiple smaller pieces to make a “quilt effect”. All you need is some fabric, a pair of scissors, some battling and a stapler or staple gun, and any other tools you might use to remove and reassemble the seat like a screwdriver or a needle nose plier.
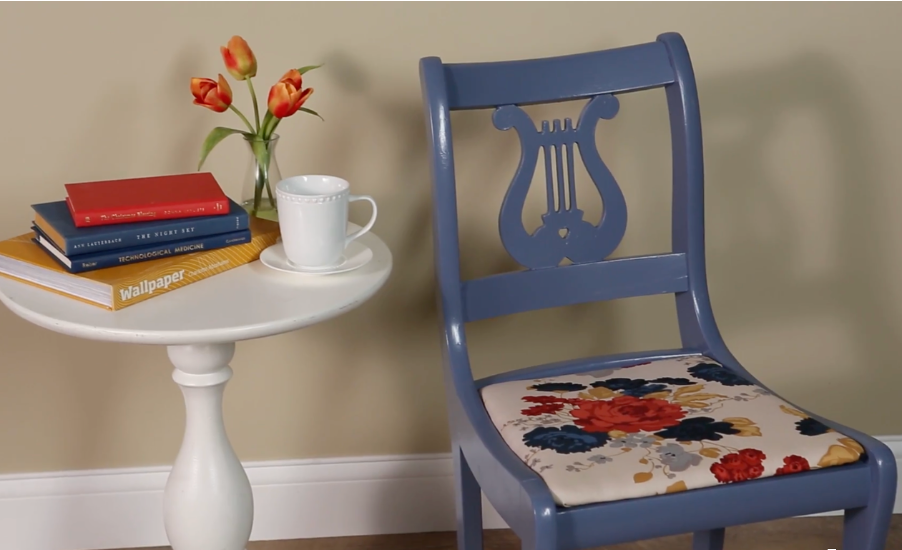
First take off the seat and remove the original fabric carefully. Use this original fabric as a template to measure your new fabric, cutting the fabric slightly larger than the original fabric. Then place the new fabric on top of your battling and cut the batting to size. Staple on the batting, pulling it quite tightly and then trim off the excess. Then tuck in the corners and staple. Place the seat on top of the new fabric you’ve chosen and centre it so it covers the fabric equally. Then staple on the fabric, tuck in the corners and staple again and trim off the excess. Then all you need to do is reattach the seat.
2. Quick Fabric Art
Need new wall art? For this fabric project all you need is some fabric, preferably one with a fabric pattern you’d want to see on your wall, a canvas, and a stapler, as well as anything else you feel creatively inspired to use. Make sure the measurement of the fabric, and the canvas you have in mind align with each other.
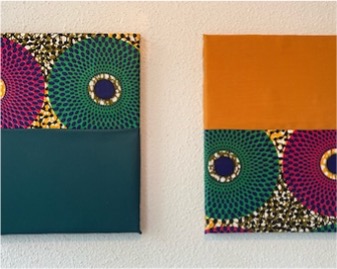
First iron the fabric, making sure it has no creases and lines. Then place the fabric, pattern side down, on your work surface and centre the canvas on top. Put a staple on each side in the centre, making sure to pull the fabric tight as you staple. Check the canvas from the front occasionally to ensure the fabric is straight and without creases. Then fold and staple the corners and trim the excess fabric and you’re done!
This can be used as is if you think the fabric is stunning enough as is or you can use this fabric wall art as a base to add more to the canvas and take it to the next level.
3. Fabric Phone Case
Using some of the pieces of fabric you have laying around you can make a little phone case, with a clasp so that you can attach it to your bags, keys, or whatever is most handy for you. All you need to make this is a clasp (any sort of keychain clasp), a small amount of fabric (one that is twice as wide as your phone), an iron and a small amount of fusible fleece and some minimal amount of thread to stitch the pieces together. Please note that the making of the phone case requires some simple stitching skills.
First cut your fabric so that it’s twice as wide as your phone plus two or three inches, so if your phone is an iPhone 11 (which is 2.98 inches wide) double the width would be 5.96 inches wide, plus another two to three inches which would be about 9-10 inches. Then measure your phone’s length double that and then add a couple of inches. So again, if you’re using an iPhone 11 (which is 6.1 inches long) double the length would be 12.2, plus another two or three inches which would be about 14-15 inches. You now have a fabric that is double (and then some) width x double (and then some) length. Then cut a piece of fusible fleece that is the same size and iron it to the back of your fabric. This fleece material adds cushion and protection to your phone case. Then fold your fabric half lengthwise and stitch across one of the short sides and down the long side.
Then turn it all right side out and press it flat with an iron. Now after the material has cooled a little, get your phone and test how far up the phone you want your phone to go and cut off any extra length you don't need. After this fold under the unsewn edge and stitch this edge closed. Now fold the edge you just sewed up as far as you want it to fit your phone and sew each side up. Your phone should now be able to slip inside. Now to make the little strap, cut a piece of fabric about 4 inches long by 2 inches wide. Fold it in half with the right sides together and sew up the long side. Turn it right side out and press it. Then fold it in half, loop your clasp through it and sew it in place in several places on the back of your wallet.
(credit for the phone case instruction and concept: Amber via Crazy Little Projects and link to direct article: https://crazylittleprojects.com/simple-phone-wallet-tutorial/)
If you try any of these out, let us know! Reach out to us via our social media pages and share how you turned your leftover scraps into something totally new!
- Back to Blogs